How to Use Powerpoint to Create Background Images
Customize your Background Images with Powerpoint- find out how!
Creating Background Images to Use in Templates
CommandCenterHD’s template tool allows you to easily add custom templates to add variety and punch to your digital signage presentation. The core of a template is the background image, which fills the screen and is displayed on each slide in every campaign that utilizes a particular template.
Background images can be created in a number of different graphics applications including Adobe Photoshop, Adobe Illustrator, Microsoft Publisher and Microsoft Powerpoint.
This demo will focus on how to utilize Powerpoint to create a compelling background image for your CCHD templates.
Getting Started
First, open Powerpoint and create a new document. Under the Design Tab, click the Page Setup button.
The desired page width of 14.23 inches by 8 inches in height will set the file’s dimensions to match the 1366×768 canvas size that your digital displays use. Click ‘OK’ to accept your changes.
The desired page width of 26.667 inches by 15 inches in height will set the file’s dimensions to match the 1920×1080 canvas size that your digital displays use. Click ‘OK’ to accept your changes.
Designing Your Background
We will now start creating our template. In this case, we want to add my company logo and set aside some areas to place RSS feeds along with Weather, Date and Time.
- Click the new slide option and create a blank slide.
- Click on the Home tab, select the first slide in your series and click Delete to remove the Title slide that shows up by default. You should now have a single blank slide in your campaign.
- Click on Insert and then select the shapes option.
- From here, we use the shape tools to fill the slide background.
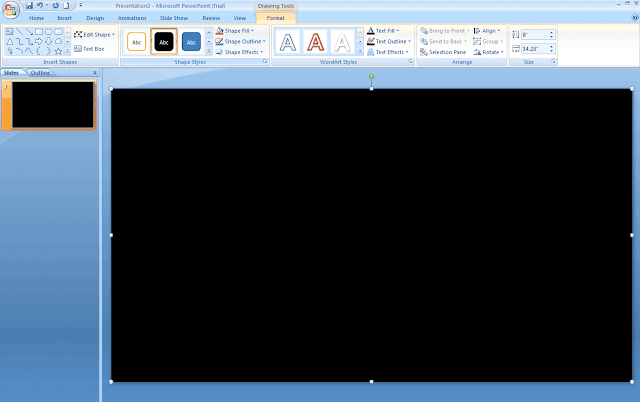
- To change the color and characteristics of your slide, simply click on the Format tab and adjust the shape fill and stroke of your box.
- Next, draw some additional shapes to accommodate a main hero graphic/video along with two side graphics/videos.

- Next we want to add a logo to my new template. To do this, we simply click on the Insert tab, then click on the Picture option, I can select my logo from my computer to insert a picture.
- We will cap the template off with a space for RSS at the bottom of the page. To do this, select the rounded edge rectangle tool and add the shape to my template.

Making Things Interesting
We now have a nice framework for a digital signage template in place. However, it does look a bit flat. Subtle dimension and color can go a long way to give your templates an added punch. One way to add dimension to a template is by using gradients and shadows. Take the following steps to create some gradients and shadows to your template.
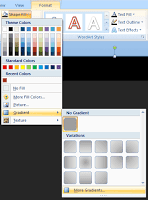
- First, select the shape you want to add effects to. In this case, we will select the black background box.
- Next, click Shape Fill > Gradient > More Gradients
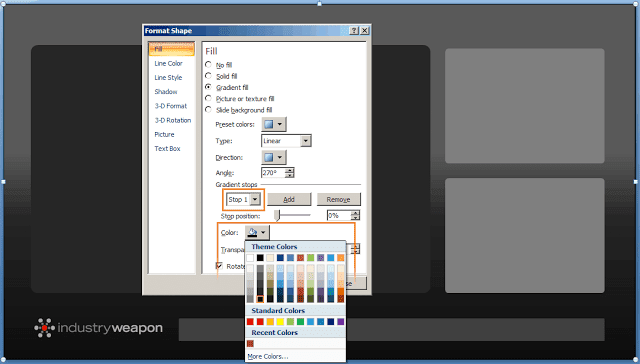
- Under ‘Fill’ select ‘Gradient Fill’
- Powerpoint uses gradient stops to allow you to adjust the color of your gradient. Select the gradient stop (1-5) and adjust the color of that stop using the color toggle. Adjust until you are happy with your gradient’s appearance and click Close.
Adding Dimension
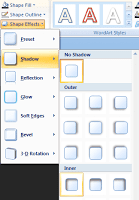
- For the other rectangles on my template, we will apply an internal shadow to give them a recessed look.
- Click on the shape you wish to edit.
- Click Shape Fill > then select the effect you wish to apply. In this case, we select an inner shadow with a top left lighting effect.
- Apply your effect(s) to all of the elements you wish.

Saving Your Background
- Click File.
- Click Save As.
- Set your destination to save the images. (your choice)
- Click the drop down arrow on Save file as type:.
- Scroll down and select JPEG File Interchange Format.
- Click Save.
- When asked “Do you want to export every slide in the presentation or only the current slide?”,click Current Slide.
- PowerPoint will display the name and location of the folder where your pictures are located.
- You are now ready to upload your background image into a template in CommandCenterHD.
The fun doesn’t stop there. Using the fundamentals in this tutorial, feel free to play around with all of the tools and options that Powerpoint provides to create compelling background images for your CommandCenterHD templates.