Clover Menu Boards - Tutorial
App Introduction
- Now your digital menu boards can immediately reflect product and price changes, based on inventory data, with Spectrio’s solution. Menu boards update via the Clover Point Of Sale system. Create a contemporary dining experience for your customers by also promoting specials with high-quality images and video. Easily edit backgrounds and templates to match your brand within the signage software. This solution supports one or more digital menu boards.
- After initial setup, users will only need to maintain their products and descriptions from within their Clover POS, and their Menu Boards will automatically update.
App Requirements
- System Requirements:Spectrio’s CommandCenterHD 17.1.001 or later.LG webOS 3.00 display or Spectrio Certified media player capable of supporting the Clover App.Speak to your account representative for device recommendations.Internet access to the media player is required for receiving content updates.Clover POS.Desktop/Laptop computer for initial setup and CommandCenterHD configuration.
Installing the App
Installing Menu Board in the Clover Dashboard
- Login to your Clover Merchant Dashboard and search for “Menu Board” in the Clover App Market.
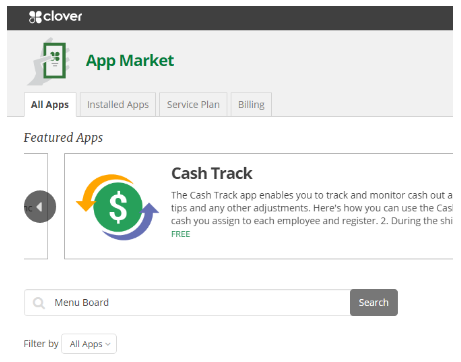
2. Click on the Menu Boards App.
- Select a subscription tier:
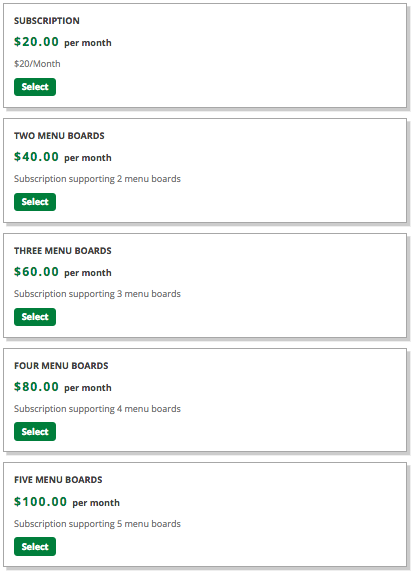
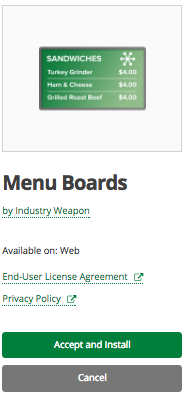
3. Once you have made your subscription selection, click on Accept and Install button on the left side of the page.
4. You can now use the Launch button in your Clover Dashboard to access Menu Boards.
5. Once you have received your onboarding materials from Spectrio. You will have access to the CommandCenterHD login page: https://www.spectrio.com/acquisitions/industry-weapon/ and click Login.
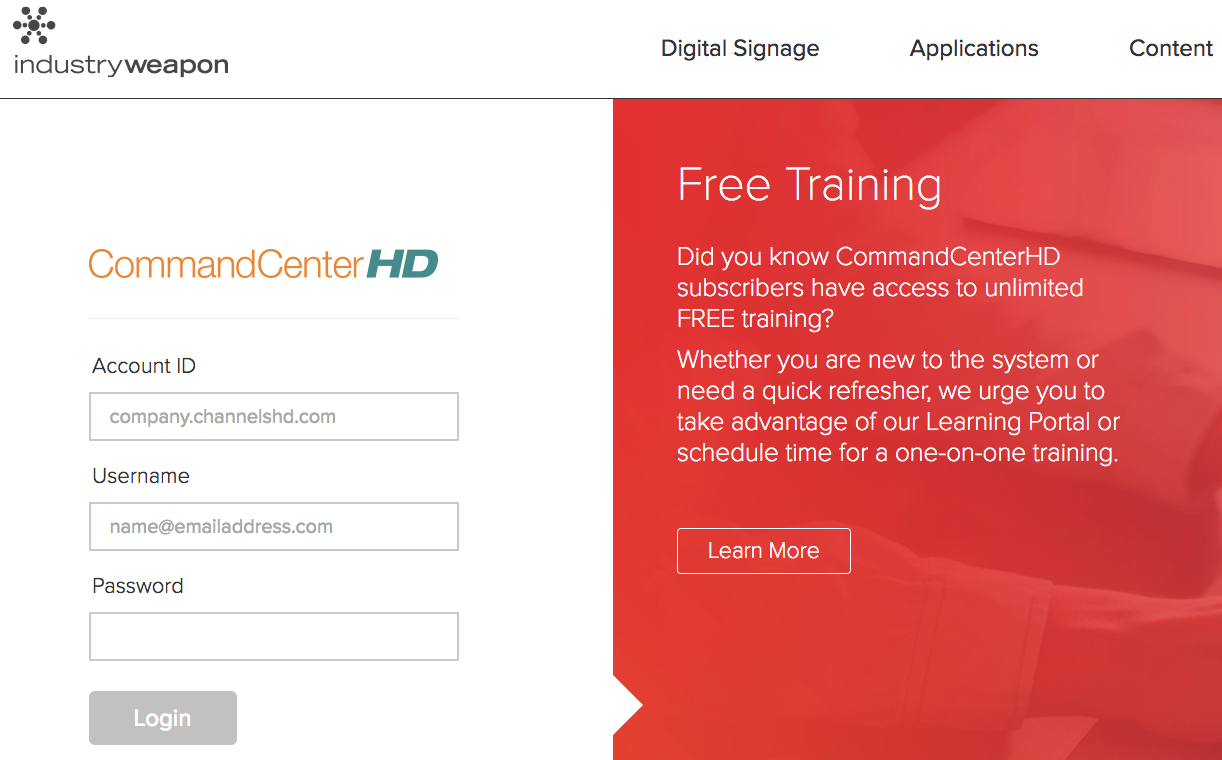
6. On this page you will enter your:
- Account ID: http://accountname.channelshd.com- Replace accountname with the name of your CommandCenterHD account
- Username
- Password- Note: If you do not have this information, please contact your System Administrator.
Installing Clover Menu Board App in CommandCenterHD
- On your CommandCenterHD Dashboard click on the Apps section on your navigation bar.

- You can search for or scroll through the Store to find Clover Menu Board, click on the App
- On the next page click on the Install button.Note: if you are not the Administrator for CommandCenterHD, you will see a “Request Install” which will be sent to your company’s Administrator for installation.
- Once the app is installed, it will display in your My Apps section in CommandCenterHD
App Configuration
Once your Clover Menu Board App is installed, you can open the app to configure and create your Menu Boards. The first time you open the app, you will be directed to authenticate your Clover OAuth token. After initial setup, you will not need to re-authenticate.
Menu Board Creation
When you open the Clover Menu Board App, you will default to the “Menus” section. Here you can create or edit existing menus. A menu is defined as the set of products or services that you would like to display.
- To create a new menu, click on New Menu
- Give your menu a name which will display on your board.For example “Breakfast”
- Choose your store from the drop down.You may have more than one if you are a multi-store owner.
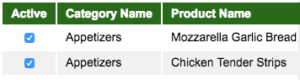
- Once you select your store, your POS data will populate for you to choose the category for the items you wish to display.Once you select a category, your POS items will display. Check the box “Include” to select those items you wish to include in your menu.Note: Menu Items with a QTY of 0 will NOT appear on your Menu Boards.

Note: Space is limited on your Menu Board to maintain size and quality of the display. You may change your menu items at any time.
Your selected items will appear on the far right in the Selected Items section:
6. Click Save to save your Menu.
Layouts Section
Once you have created your Menu, click on the “Layouts” section. Here you configure your Layout, background, and overall style of your Menu Board.
- To create a new Layout, click New Layout
- Choose a name for your Layout.Note: the name for your Layout will not display on your final Menu Board, but you will need to know the name of the Layout to select the asset for playback.
- Choose the menu you would like from the drop down.
- Once you select your Menu, you will see options to select Category Formatting for your items to display (1 column, 2 column etc).
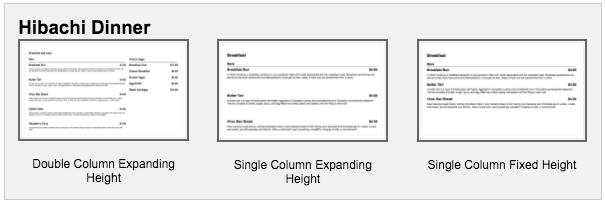
5. As you select these, a preview will generate for you to view your progress.
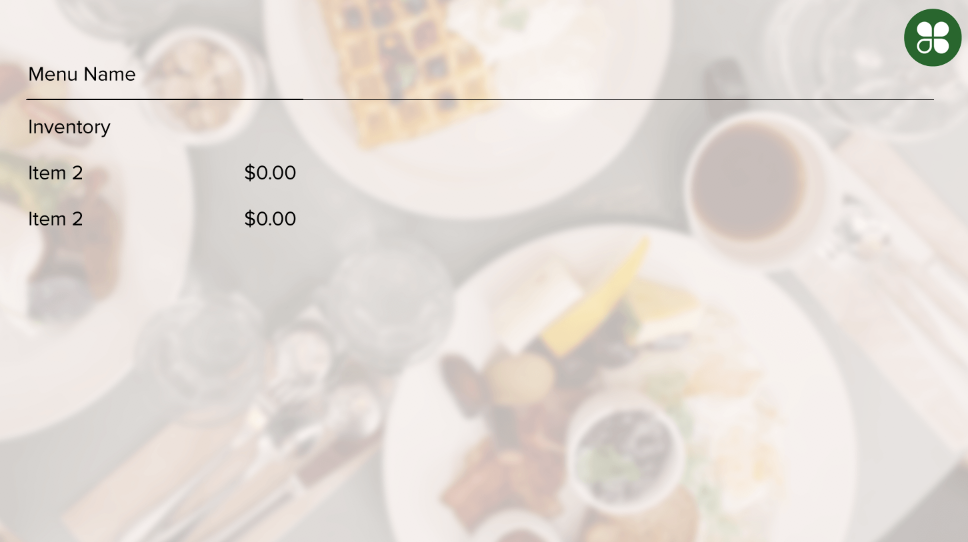
6. You can choose to add a background image or not.Background and Logo images can be added to the App by navigating to the Uploads section of the App using the button at the top of the page:Once on the Uploads page, you can select an image from your computer to upload as a Background image or Logo.
7. When you are satisfied with your Layout, click Save you will be able to view or edit your Layouts or Menus at any time.
8. When you are ready to get your Layouts to your screens, click on the Publish icon on your Layout, this will generate a Media Asset in your MediaHD section of CommandCenterHD.
Note: if you need to make changes to your Layout (to change a background, edit your menu items, etc), you will need to Save and Publish again, and add the new asset to your Campaign.
- Layouts can be previewed from within the App by navigating to the Layouts section of the App using the button at the top of the page:
- Once on the Layouts page, you can preview a Layout by clicking on the eye symbol
Creating Campaigns
If you have questions about creating Templates, Channels, or Campaigns, please contact our Training Department for additional information.
You can add your menu Layouts to existing Campaigns or create a new Campaign. We recommend that you use a template with a black background or an image that matches your background as the template will flash prior to HTML assets loading.
- To begin, open the CommandCenterHD Dashboard, where you’ll find four main options. Click on the third one, CampaignsHD.
- Choose an existing Campaign by clicking on the Manage button next to it, or create a new Campaign by clicking on Add Campaign the button.
- From the Slide Editor, you will see an App Assets section at the bottom. If you open this up, you will see your menu Layouts available that you have exported.
- Click and drag your desired Board to your slide, double click to open up the information, and checkmark Fullscreen to have your Menu Board fill your slide.Note: you can make your menu Layouts any size you like, and you can include any other assets in your Campaign as you wish.
- We recommend that you go into Slide Settings and increase your slide duration to greater than the default 30 seconds. This will prevent a reload of your slide for your desired duration.Note: that if you make changes to your Menu Boards, those changes will not be reflected in playback without a refresh of the slide.
- Once you have created your Campaign, click Save
- You can now add your Menu Board campaign to an existing Channel or create a new Channel in the ChannelsHD section of CommandCenterHD.
FAQ
- What are the Menu Board resolutions?Currently, our templates are built for 1920x1080p resolution. However, we are able to build custom templates for additional resolution support and other custom layout options. For custom template questions, please contact your Account Manager.
- Where can I find my Menu Board assets?Within CampaignsHD:Your app asset will be in the apps tab of the Slide Editor. Within TemplatesHD:Your app asset will be found in Interactive Content, “Add Embedded Web Page from App”.